
Table of Contents
ToggleLearning how to 3D printing can seem overwhelming at first. Machines that create physical objects from digital files sound like science fiction. But millions of hobbyists, entrepreneurs, and creators now use this technology daily. The process is simpler than most people expect.
3D printing turns digital designs into real objects by building them layer by layer. A printer deposits material, usually plastic filament, following instructions from a computer file. The result? Custom parts, prototypes, toys, tools, and artistic pieces that would cost far more through traditional manufacturing.
This guide covers everything beginners need to know. Readers will learn how 3D printing works, what equipment to buy, which software to use, and how to complete their first successful print. By the end, anyone can start creating.
Key Takeaways
- Learning how to 3D printing starts with understanding FDM technology, which builds objects layer by layer using melted plastic filament.
- Entry-level 3D printers between $200–$600 offer the best balance of reliability and features for beginners.
- Free slicer software like Cura or PrusaSlicer converts 3D models into printable G-code instructions your printer can follow.
- PLA filament is ideal for beginners because it prints at lower temperatures and produces minimal odor.
- Start with simple models like calibration cubes before attempting complex designs with overhangs or intricate details.
- Always level your print bed and watch the first layer closely—proper adhesion prevents most common printing failures.
Understanding How 3D Printing Works
3D printing builds objects one thin layer at a time. This process is called additive manufacturing. Instead of cutting material away like a sculptor, the printer adds material until the object is complete.
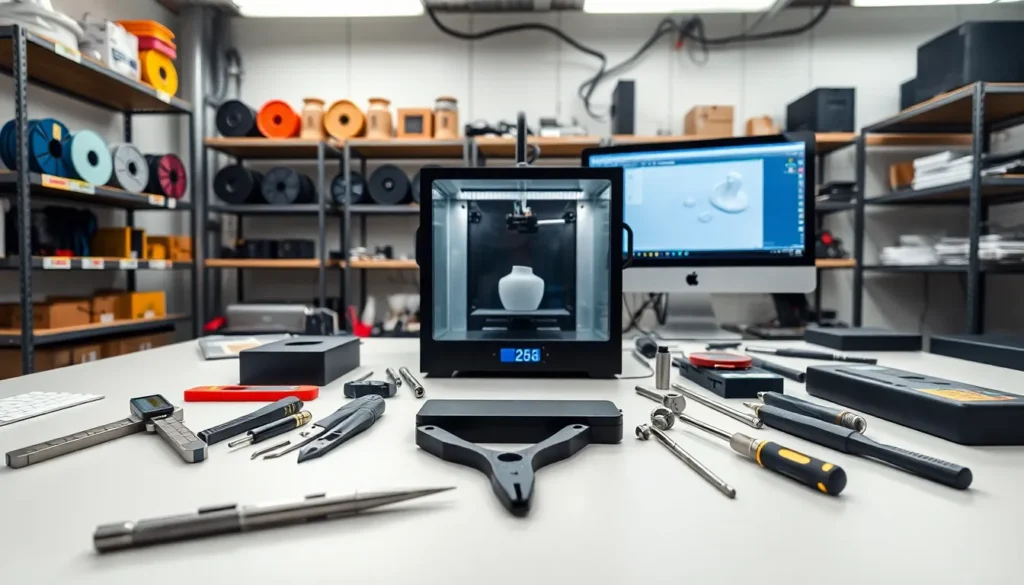
The most common 3D printing method for beginners is Fused Deposition Modeling (FDM). An FDM printer heats plastic filament until it melts. A nozzle then deposits this melted plastic onto a build plate. The nozzle moves in precise patterns, controlled by motors and guided by software.
Each layer bonds to the one below it. The printer repeats this process, sometimes hundreds or thousands of times, until the object is finished. Layer heights typically range from 0.1mm to 0.3mm. Thinner layers produce smoother surfaces but take longer to print.
Other 3D printing technologies exist too:
- Stereolithography (SLA): Uses UV light to cure liquid resin layer by layer. Produces highly detailed prints.
- Selective Laser Sintering (SLS): Uses lasers to fuse powder materials. Common in industrial applications.
For most beginners learning how to 3D printing at home, FDM offers the best balance of cost, ease of use, and material options. The printers cost less, filament is affordable, and the learning curve is manageable.
Choosing Your First 3D Printer
Selecting the right 3D printer matters. A good first machine makes learning easier and reduces frustration.
Budget is the first consideration. Entry-level 3D printers start around $200. Mid-range options run $300-$600. These price points cover most beginners well. Spending more doesn’t always mean better results, especially for someone still learning how to 3D printing.
Key Features to Evaluate
Build Volume: This determines the maximum size of objects the printer can create. A 220mm x 220mm x 250mm build volume handles most beginner projects. Larger volumes cost more.
Heated Bed: A heated print bed helps plastic stick properly and reduces warping. Most quality printers include this feature. Avoid models without it.
Assembly Required: Some 3D printers arrive fully assembled. Others require partial or complete assembly. Pre-assembled units cost slightly more but save time and potential headaches.
Community Support: Popular printer models have active online communities. These forums provide troubleshooting help, print settings, and upgrade guides. The Creality Ender 3 series, Prusa Mini, and Anycubic Kobra all have strong community backing.
Recommended Starter Printers
The Creality Ender 3 V3 offers excellent value under $300. It prints reliably and has massive community support. The Bambu Lab A1 Mini costs more but includes automatic features that simplify operation. The Prusa Mini+ provides exceptional quality and customer support for around $400.
New users should prioritize reliability over features. A printer that works consistently teaches more than a temperamental machine with advanced capabilities.
Essential Software and File Types
3D printing requires several software types. Understanding each one helps beginners work efficiently.
Design Software
This software creates 3D models from scratch. Popular free options include:
- Tinkercad: Browser-based and beginner-friendly. Perfect for simple designs.
- Fusion 360: More powerful, free for hobbyists. Steeper learning curve but greater capabilities.
- Blender: Open-source and feature-rich. Better for artistic and organic shapes.
Many beginners skip design software initially. They download pre-made models instead. Websites like Thingiverse, Printables, and MyMiniFactory host thousands of free 3D models ready for printing.
Slicer Software
Slicers are essential for anyone learning how to 3D printing. This software converts 3D models into instructions the printer can follow. It “slices” the model into layers and generates G-code, the language 3D printers understand.
Popular slicers include:
- Cura: Free, widely used, compatible with most printers
- PrusaSlicer: Free, excellent default profiles
- Bambu Studio: Free, optimized for Bambu Lab printers
Slicers control print quality through settings like layer height, print speed, infill percentage, and support structures. Default profiles work well for beginners. Users can adjust settings as they gain experience.
Common File Types
.STL: The most common 3D model format. Almost universal compatibility.
.OBJ: Another model format that includes color and texture data.
.3MF: A newer format that packages multiple pieces of information together.
.GCODE: The final output from slicer software. Contains actual printer instructions.
Most 3D printing workflows follow this pattern: download or create an STL file, import it into slicer software, adjust settings, export G-code, and send that file to the printer.
Steps to Complete Your First Print
The first print teaches more than any guide can. Here’s how to approach it successfully.
Step 1: Set Up the Printer
Follow the manufacturer’s instructions for assembly. Level the print bed, this step is critical. An uneven bed causes adhesion problems and failed prints. Most printers include leveling guides or automatic leveling features.
Load filament according to the printer’s instructions. PLA filament works best for beginners learning how to 3D printing. It prints at lower temperatures, doesn’t require an enclosure, and produces minimal odor.
Step 2: Choose a Simple Model
Start with something small and straightforward. A calibration cube, a simple phone stand, or a keychain works well. Avoid complex models with overhangs, thin walls, or intricate details for the first attempt.
Download an STL file from Thingiverse or a similar site. Many printers also include sample files on an SD card.
Step 3: Slice the Model
Open the slicer software and import the model. Select the printer profile, most slicers include presets for popular machines. Use default settings for the first print.
Check the preview to see how the printer will build the object. The slicer estimates print time and material usage. Export the G-code file to an SD card or send it directly to the printer via USB or Wi-Fi.
Step 4: Start Printing
Insert the SD card or initiate the print from the connected software. Watch the first few layers closely. The filament should stick to the bed without lifting at corners. Lines should appear smooth and consistent.
If the first layer looks good, the rest usually follows. Most prints take between 30 minutes and several hours. Resist the urge to touch the print or the bed during this time.
Step 5: Remove and Inspect
Let the print cool before removal. Many materials release more easily from a cooled bed. Use a spatula or scraper to gently lift the print if needed.
Inspect the result. Note any issues, stringing, layer separation, rough surfaces, and research solutions. Each print teaches something about how to 3D printing better.
Troubleshooting Common Issues
Print not sticking: Clean the bed with isopropyl alcohol. Adjust bed leveling. Increase bed temperature slightly.
Stringing between parts: Lower print temperature. Increase retraction settings in the slicer.
Layer lines very visible: Reduce layer height. Slow print speed. Check for loose belts.